How to Build a Portable Axe Sharpening Station for Off-Grid Living
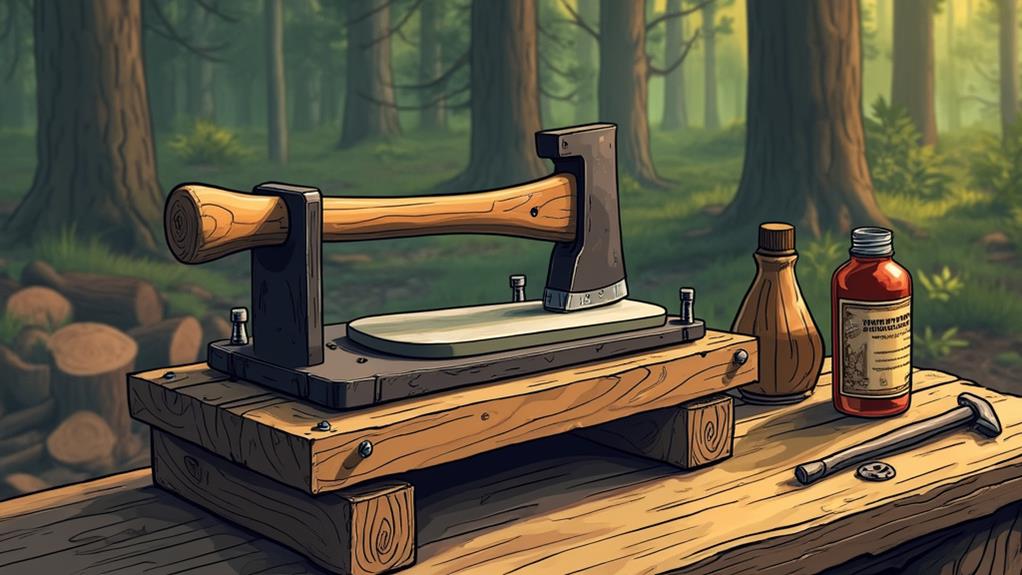
When living off-grid, keeping your tools sharp is essential. Building a portable axe sharpening station provides a practical solution. Start by gathering specialized tools like a Veritas MKII honing jig and DMT diamond grit sharpening stones. Next, consider durable materials such as poplar or birch plywood for the construction.
Here's a step-by-step guide to create a sturdy, efficient sharpening station:
- Gather Materials and Tools: Obtain a Veritas MKII honing jig, DMT diamond grit sharpening stones, poplar or birch plywood, screws, and glue.
- Design: Sketch out a simple, compact design that includes a stable base, slots for holding sharpening stones, and a secure mount for the honing jig.
- Build the Base: Cut the plywood to your desired dimensions for the base. Ensure it's large enough to hold your sharpening stones and jig securely.
- Assemble: Attach the plywood pieces using screws and glue to form a sturdy frame. Create slots or compartments for the sharpening stones.
- Mount the Jig: Secure the Veritas MKII honing jig in a convenient position on the station.
- Final Touches: Sand any rough edges and apply a protective finish to the wood.
By following these steps, you'll have a reliable and portable sharpening station that meets your off-grid needs.
Tool Acquisition and Setup
When setting up your portable axe sharpening station, start by investing in essential tools to ensure optimal results. First, acquire a Veritas MKII honing jig. This tool is crucial for precise sharpening, ensuring consistent edge angles and improved cutting performance for your axes and other tools.
Next, purchase a set of DMT Diamond grit sharpening stones. These stones come in both coarse and fine grits, allowing you to effectively sharpen and polish your tools for peak functionality. This combination guarantees that your axes and other cutting tools remain in prime condition.
Consider adding a strop kit to enhance the polishing process after sharpening. Stropping helps achieve a razor-sharp edge, which is invaluable for demanding off-grid living projects. To keep everything organized, design a dedicated storage solution for your sharpening tools. An organized setup not only keeps your tools easily accessible but also increases your efficiency during tasks.
Concept and Design
Start by gathering durable materials such as 1/2-inch and 1/4-inch Baltic birch plywood and oak banding to ensure your sharpening station can withstand outdoor conditions. Plan a compact layout with fitted dividers and a removable tray for easy access to your sharpening stones. Incorporate ergonomic features like a sturdy handle and a locking mechanism to make transport and use both comfortable and secure.
Materials and Tools Needed
Creating a portable axe sharpening station demands a careful selection of materials and tools to ensure durability and user-friendliness. Begin with 1/2 and 1/4 inch Baltic birch plywood for constructing the main structure, as it offers a good balance of strength and lightness. Reinforce the edges with oak banding for added durability and a polished appearance.
Essential tools for the construction include a table saw for precise cuts and a band saw for shaping curved components or intricate details. A palm router is also crucial for smoothing edges and creating rounded profiles, providing the station with a professional finish.
To enhance portability and organization, incorporate a removable tray to store your sharpening stones. This feature will keep everything neatly organized and easily accessible. Use a marking gauge and Forstner bits when drilling holes to ensure accurate measurements and prevent wood splitting during assembly.
Compact Layout Planning
With your materials and tools in hand, it's essential to focus on a compact layout that enhances both portability and functionality. When designing your portable axe sharpening station, prioritize a space-efficient layout that simplifies transport and storage. Opt for lightweight materials like Baltic birch plywood to achieve this objective. Include a removable tray to securely hold your sharpening stones, ensuring your workspace remains tidy and organized.
To maintain efficiency, divide the tray into compartments to accommodate different types of sharpening stones. This setup allows for quick access and minimizes interruptions while working off-grid. Stability is crucial for a functional sharpening station, so use finger joints to secure components and clamps during assembly to maintain squareness and structural integrity.
Here's a simple layout for your station:
| Feature | Description |
|---|---|
| Material | Lightweight Baltic birch plywood |
| Tray Design | Removable with divided compartments |
| Stability | Finger joints and clamps for assembly |
Ergonomic Considerations
When designing a portable axe sharpening station, ergonomic considerations are essential to ensure comfort and efficiency. Set the working height at waist level to prevent strain during prolonged use, maintaining a natural posture and reducing the risk of back pain.
Incorporate a removable tray for sharpening stones. This feature allows for easy access and organization, enhancing the efficiency of your sharpening tasks. Ensure the tray handles are designed for a comfortable grip, making it easy to transport the station. Using lightweight yet durable materials like Baltic birch plywood is crucial. It keeps the station portable while ensuring it can withstand off-grid conditions.
The placement and angle of your sharpening tools are equally important. Position them to minimize awkward wrist positions, promoting ergonomic use and reducing fatigue. Additionally, design the tray sides with handles that provide a comfortable grip, facilitating easy transportation. With these ergonomic considerations, your portable axe sharpening station will be both functional and comfortable, making off-grid living more manageable and enjoyable.
Building the Finger Joint Jig

Building a finger joint jig takes about 15 minutes and is crucial for crafting precise finger joints for your portable axe sharpening station. To begin, gather a 1x6x22 piece of plywood and a 1/2 x 1/2 square dowel. These materials provide the necessary precision and stability for your jig. Secure the jig to your miter fence to ensure alignment and consistent cuts, which are essential for creating the finger joints that will hold your box assembly together.
Next, install a stacked dado blade on your table saw. This blade is vital for making precise cuts that result in tight-fitting finger joints, thereby enhancing the durability of your sharpening station. Use a marking gauge to set your cut heights based on the material thickness. Clearly mark your joinery locations with a pencil to maintain accuracy throughout the process.
Refer to video tutorials for additional guidance and tips. These resources can help ensure that your finger joint jig is constructed correctly, making your hand tool more effective. With your jig ready, you'll be well-equipped to complete the box assembly for your portable axe sharpening station, ensuring it's both functional and durable.
Preparing the Wood Parts
Begin by selecting a durable wood species such as poplar or birch plywood to ensure your sharpening station's longevity. Accurately measure and cut four main parts from a 1x6x6 piece of wood, clearly marking the joinery locations. Use a band saw for cutting and a spindle sander for shaping and smoothing the edges, ensuring a clean, splinter-free finish.
Selecting Quality Lumber
Choosing the right lumber is crucial for building a portable axe sharpening station that will endure. For durability and resistance to wear, opt for quality hardwoods like oak or maple. These woods are robust enough to withstand the demands of off-grid living. Ensure the lumber is properly seasoned and free from defects such as knots or warping, which could undermine the station's structural integrity.
When selecting lumber dimensions, prioritize stability. Using 1x6 boards for the sides and a thicker 1x12 for the base can significantly enhance sturdiness. Pay attention to grain direction when cutting to minimize tear-out and achieve cleaner edges during assembly.
To protect the sharpening station from the elements, apply a weather-resistant finish. This will shield the wood from moisture and prolong its lifespan, ensuring the station remains functional and reliable.
Accurate Measurement Techniques
Accurate measurement techniques are crucial for preparing the wood parts of your portable axe sharpening station. Begin by using a marking gauge to set precise cut heights according to the wood's thickness. This ensures each part is accurately measured and cut to fit perfectly.
Next, use a pencil to clearly mark joinery locations to help align each piece during assembly, minimizing errors. Before gluing, perform a dry assembly of the parts. This step allows you to verify that everything fits together properly and identify any necessary adjustments early on.
When assembling, use a spacer block to ensure the removable tray is flush with the top of the box, creating an even surface for sharpening. To maintain the structural integrity of your sharpening station, pre-drill holes with a forstner bit. This prevents the wood from splitting when screws are inserted.
Cutting and Shaping Wood
Crafting the wood components for your portable axe sharpening station demands precision and care. Begin by selecting high-quality wood, such as poplar or birch plywood, known for their durability and stability. Use a marking gauge to measure and mark the dimensions accurately, ensuring precision in your cuts.
A band saw is ideal for cutting, as it provides smooth and straight edges. Once cut, refine the parts using a spindle sander to remove any milling marks, essential for a professional finish. Pre-drill holes for fasteners, especially in softer woods, using a Forstner bit to prevent tear-out and enhance stability.
To improve ergonomics, use a palm router with a round-over bit on the edges to eliminate sharp corners, making the station safer and more comfortable to handle.
Assembling the Box

Begin by cutting the primary pieces from a 1x6x6 poplar board. You'll need to create two sides, a front, and a back. Clearly mark the joinery locations with a pencil for accuracy. Use a marking gauge to set precise cut heights, tailored to the material thickness. After cutting, perform a dry assembly to ensure all parts fit together perfectly—this step is crucial for a sturdy sharpening tool station.
Next, pre-drill holes using a Forstner bit to prevent splitting during assembly, ensuring the box's durability over time. For added functionality, design cleats to support a removable tray for your sharpening stones, which will be detailed later.
Use a band saw for gang cutting semi-circles from the sides, and smooth any milling marks with a spindle sander for a polished finish. Rehearse the glue application order, then apply glue to all joint surfaces except the visible exterior faces. Use clamps to maintain squareness during the glue-up process. This meticulous assembly will provide a reliable foundation for your axe sharpening station.
Creating the Cleats and Tray
With the box assembled, it's time to create the cleats and tray that will hold your sharpening stones securely. Begin by cutting your 1x6 poplar pieces to the appropriate dimensions for the cleats. These cleats will provide stability and support for the removable tray. Use a band saw for precise cuts to ensure uniformity and a clean finish.
Next, design the tray with routed recesses to securely hold your sharpening stones. These recesses will prevent the stones from moving during use, making your sharpening tasks more efficient. Before attaching the cleats to the tray, pre-drill the holes to avoid splitting the wood and to ensure a tight fit during assembly.
Use a spacer block during installation to keep the tray flush with the top of the box. This will promote a seamless look and improve functionality.
Secure the cleats to the sides of the box, ensuring they're level and properly aligned. Once the cleats are in place, slide the tray in and check for stability. This setup will hold your sharpening stones firmly and make your portable axe sharpening station both efficient and effective.
Shaping and Finishing
Shaping and finishing your portable axe sharpening station is crucial for both functionality and longevity. Start by using a palm router with a 1/4-inch round-over bit to smooth the edges, ensuring a comfortable grip and minimizing the risk of splinters. Proceed by sanding all surfaces, beginning with 120-grit sandpaper and progressing to 220-grit for a smooth finish. This enhances both tactile comfort and visual appeal.
After sanding, apply a high-quality wood finish such as tung oil or polyurethane to enhance durability and water resistance while highlighting the wood grain. Use a sponge or cloth to apply the finish evenly, allowing adequate drying time between coats to form a strong protective layer against moisture and wear. Before final assembly, inspect all joints and connections for tightness and alignment, as irregularities can affect the station's functionality and portability.
Glue-Up Process
During the glue-up process, careful planning is essential to ensure a strong and durable assembly. Begin with a dry rehearsal to determine the sequence of glue application. This practice run ensures you know exactly what to do when the actual glue is applied, making the process smooth and efficient.
When ready, apply glue generously to all finger joint surfaces. Be mindful to avoid getting glue on the visible exterior faces to maintain a clean finish. The box joints are crucial for the structural integrity of your sharpening station, requiring thorough and even glue coverage.
After applying the glue, use at least eight clamps to secure the assembly. Proper clamping maintains square alignment, which is vital for overall structural integrity. Double-check that all parts are properly aligned before the glue sets, as any misalignment can lead to structural issues and compromise the functionality of your station.
Once the glue has dried, inspect the box joints closely. Clean up any excess glue that may have seeped out during clamping. This attention to detail ensures that your axe sharpening station isn't only functional but also looks professional.
Final Touches and Enhancements
Once your glue-up has dried and the basic structure is sound, it's time to add the finishing touches and enhancements that will make your portable axe sharpening station both practical and durable. Start by applying a protective finish, such as clear polyurethane or marine varnish, to shield the wood from moisture and wear, ensuring longevity in off-grid environments.
Next, consider installing an ergonomic handle on the top for easy transportation. A well-designed handle will make it simple to carry your station to different locations. To enhance organization and accessibility, incorporate a removable tray or compartment to store sharpening stones and tools. This tray will keep everything in one place, making it easy to locate what you need.
To prevent slipping and protect surfaces, install rubber feet or non-slip pads on the bottom of your station. These pads will ensure stability during use, which is crucial for both safety and efficiency. Finally, label the compartments or storage areas with a waterproof marker. This labeling will help you quickly identify contents, streamlining your sharpening tasks in off-grid settings.
With these finishing touches, your axe sharpening station will be both functional and resilient.
Conclusion
You've successfully built your own portable axe sharpening station, ideal for off-grid living. By meticulously following each step—from acquiring the necessary tools and ergonomic design to precise assembly and finishing touches—you've created a durable and efficient setup. With organized storage and a stable structure, maintaining your axes has become straightforward. Enjoy the satisfaction of a job well done and the convenience your new station brings to your off-grid adventures. Happy sharpening!