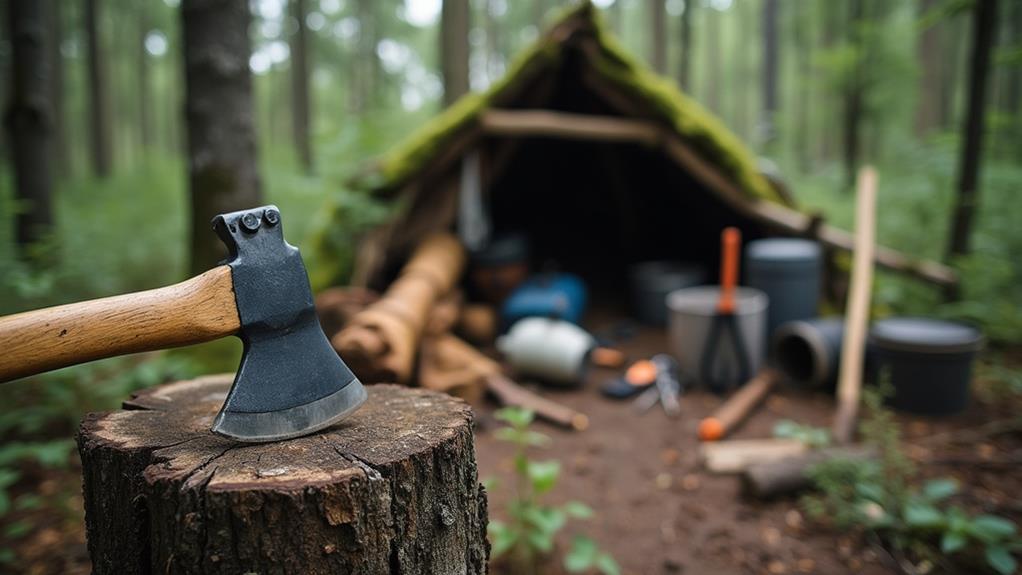
Using an Axe for Building Fences and Other Off-Grid Structures
Using an axe for building fences and other off-grid structures can significantly impact the success of your project. A high-quality axe, such as the Gransfors Bruk Swedish model, allows for precise tasks like log peeling, notching, and scribing, which are crucial for achieving snug fits and structural integrity.
This tool not only reduces manual labor but also enhances the aesthetic appeal of your work. Mastering proper technique and maintaining your axe connects you to traditional craftsmanship, ensuring durability. However, selecting the right trees and tools is equally important for the job's success.
Log Preparation
How do you guarantee your logs are ready for building a sturdy fence? Start with log peeling. Each log needs to be peeled to remove the bark, which can harbor pests and moisture. This process usually takes around 30 minutes for thinner logs. Use a drawknife for efficiency and precision.
Once peeled, focus on log drying. Properly dried logs are less likely to warp or shrink, ensuring the fence remains stable and durable. After peeling and drying, check the integrity of each log. Inspect the logs for any cracks or weaknesses that might compromise their strength.
Next, scribe each log. Scribing involves marking the "belly groove" and notch lines to secure a perfect fit during construction. Ensure the scribing width accommodates the largest gap plus an extra centimeter, with a minimum gap width of 8 cm for ideal fitting.
Essential Tools
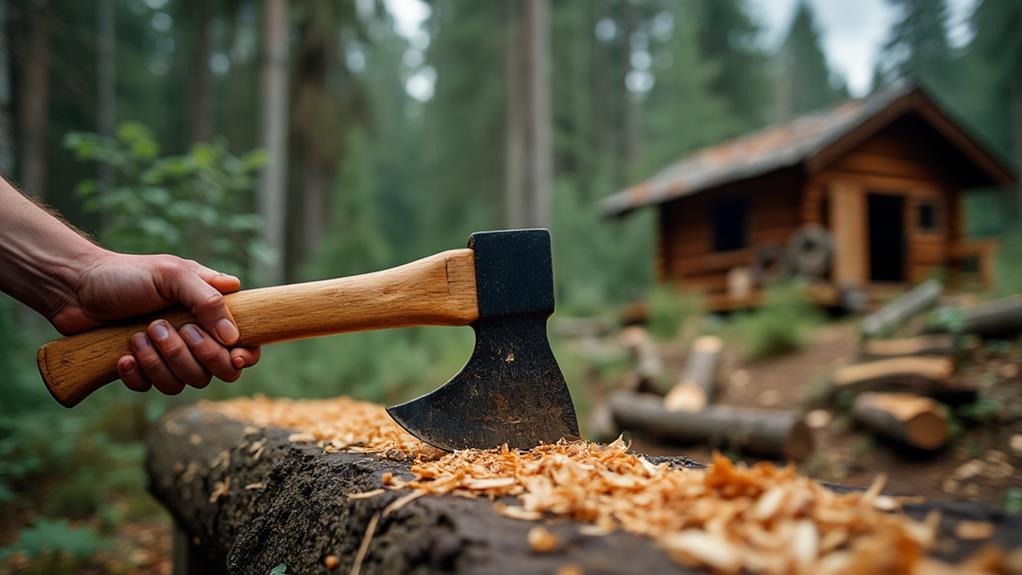
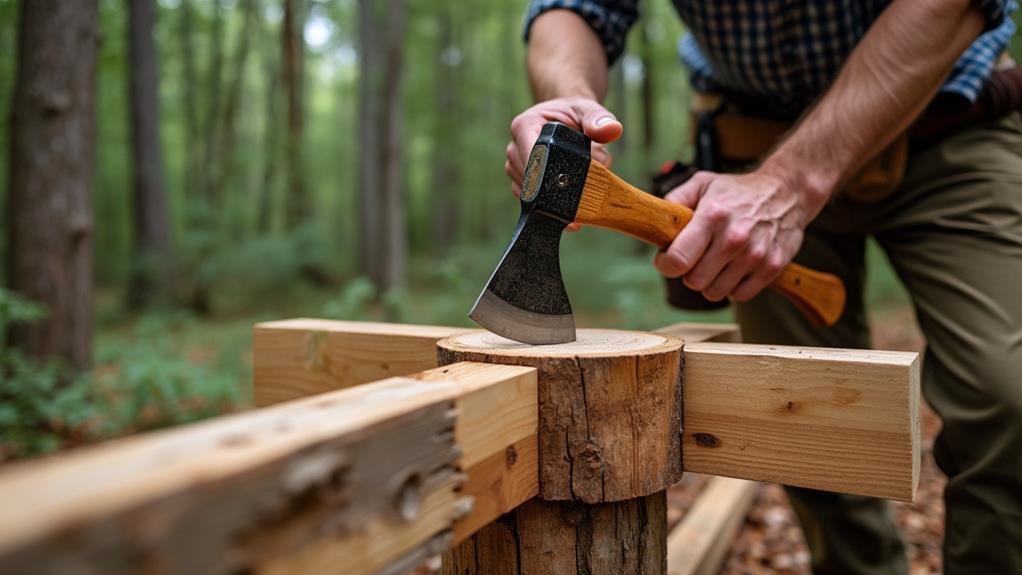
After preparing and inspecting your logs, it's time to focus on the tools that will make your fence-building process efficient and precise. The Swedish ax, particularly the Gransfors Bruk model 1900, is essential for its precision and efficiency, making it ideal for log work. Additionally, an adze axe is crucial for creating slightly concave notches, which allow for better log fitting.
To prevent log rotation during cutting, you'll need log dogs. These tools are critical for ensuring accuracy and safety when working with heavy materials. Always secure your logs properly to avoid accidents and maintain precision.
A scribing tool is another essential item. Use it to mark belly grooves and notch lines, calibrating the scriber width to accommodate the largest gap plus 1 cm for a proper fit. Don't overlook tool maintenance and safety practices. Keep your axes sharp and free of rust. Regularly inspect handles and blades for any signs of wear or damage.
Always wear protective gear, including gloves and eye protection, to minimize the risk of injury. By maintaining your tools and following safety practices, you ensure a smoother, safer building process.
Tree Selection

When selecting trees for log construction, it's crucial to evaluate the availability of large trees on your property. Limited options might necessitate experimenting with faster-growing tree species. Start by purchasing roots for an initial trial. Testing various species will help determine which trees best meet your needs.
To track your progress, use a simple table:
| Row Number | Log Number | Tree Species | Growth Potential |
|---|---|---|---|
| 1 | 1 | Species A | High |
| 2 | 2 | Species B | Medium |
| 3 | 3 | Species C | Low |
| 4 | 4 | Species D | High |
Monitor the growth and suitability of the logs, such as the initial log from each row, to gather valuable insights. Ensure the tree species you select are resilient and suited to your climate to optimize growth potential and structural integrity. Planning for future purchases of larger quantities of roots based on your initial trials can lead to a more sustainable and efficient building process.
Scribing Techniques
When you're ready to start scribing, ensure your scriber's width is calibrated to accommodate the largest gap plus an additional centimeter for accuracy. Mark the belly groove and notch lines carefully to ensure each log fits snugly against the others. Precise notch line accuracy is crucial for proper log alignment and a sturdy structure.
Scriber Width Calibration
Calibrating the scriber width is essential to ensure your fence logs fit snugly, resulting in a durable and visually appealing structure. Begin by maintaining your scriber in top condition for accurate results every time. When calibrating, set the scriber width to accommodate the largest gap between logs plus an extra 1 cm. This additional centimeter allows for ideal fitting, ensuring perfect log alignment.
Use precise calibration techniques to maintain consistency. For proper log fitting, aim for a minimum gap width of 8 cm, with a preference for 8.5 cm at the smallest gap. Align the scriber to a level line before marking to ensure accuracy throughout the scribing process.
Be prepared to adjust the scriber settings as needed when creating notches for each log. Consistently check the joint integrity after scribing to avoid issues before applying moss for sealing gaps.
Belly Groove Marking
With your scriber width calibrated, it's time to tackle belly groove marking, a crucial scribing technique. This method ensures that your logs fit snugly together, forming a solid and stable structure. The scriber helps you mark the belly groove, a concave groove on the underside of your log. This groove accommodates the natural curvature of the logs, ensuring a tight fit.
To start, set your scriber width to the largest gap you anticipate, plus an extra 1 cm. This additional centimeter ensures a tight fit without gaps. Maintain a minimum gap width of 8 cm, with 8.5 cm preferred for optimal fitting.
Precision in marking the belly groove is essential for the logs to interlock properly, contributing to the structural integrity of your construction. Ensure your scriber is aligned with a level line to maintain accurate measurements. Proper belly groove marking will facilitate subsequent construction steps, preparing your logs for the notch lines and eventual assembly.
Notch Line Accuracy
How do you ensure that your notch lines are accurate for a snug fit between logs? Precision in scribing notch lines is crucial for log fitting. Begin by calibrating your scriber to accommodate the largest gap plus an extra centimeter for accuracy. This ensures that your notches will fit snugly.
A minimum gap width of 8 centimeters is required, but aiming for 8.5 centimeters at the smallest gap enhances structural integrity. Use your scriber to mark both the "belly groove" and the notch lines, which are essential for achieving a tight fit between logs.
After marking your lines, make cuts between them to separate the wood fibers effectively, resulting in a clean notch that strengthens the joint. The accuracy of your notch line technique is vital for the success of your project. Before applying moss, verify the joint integrity by ensuring that the notches fit together tightly without any gaps.
Measuring Precision
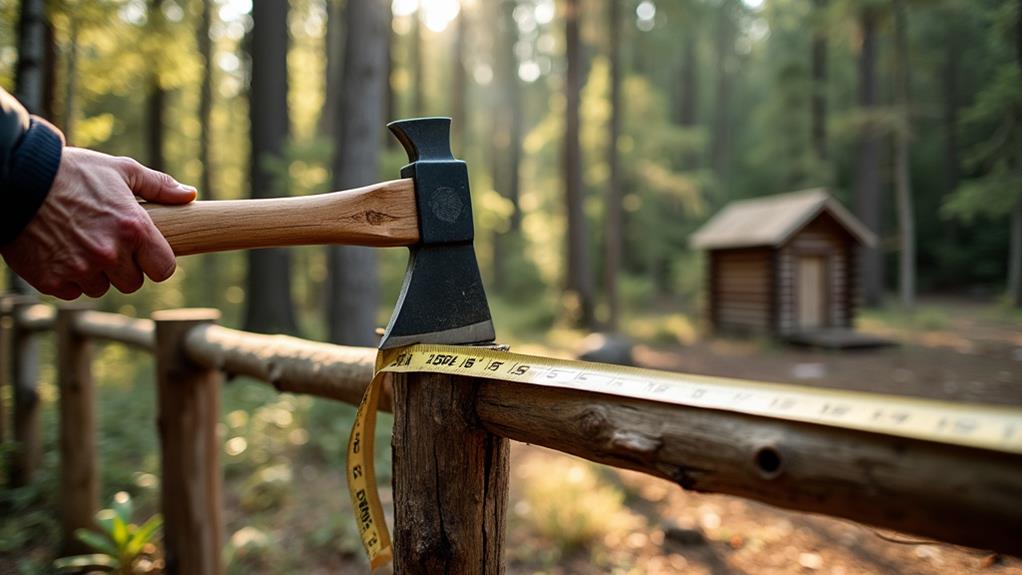
To ensure your fence logs fit perfectly, calibrate your scriber accurately. Set it to the largest gap plus 1 cm for precision. The minimum gap should be at least 8 cm, ideally 8.5 cm. Accurate scribing, including marking belly grooves and notches, will help you achieve tight, secure joints.
Scriber Calibration Techniques
Proper calibration of your scriber is essential for achieving precise measurements and accurate log fittings in off-grid structures. Regular maintenance of the scriber ensures that logs fit together seamlessly, preserving the integrity of your construction.
To begin, set your scriber to accommodate the largest anticipated gap, plus an additional 1 cm. This extra centimeter ensures that logs settle into place without any unwanted gaps. Align your scriber with a level line to accurately measure and mark the "belly groove" and notch lines on the logs. This alignment is crucial for precise cutting and fitting.
Consistently check and maintain the calibration of your scriber to guarantee accuracy throughout the log preparation and fitting process. Adjustments may be needed to create secure notches. Aim for a minimum gap width of 8 cm, although maintaining an 8.5 cm gap at the smallest point is often preferred for optimal fitting.
Minimum Gap Requirements
Precise measurement is crucial for determining the minimum gap requirements for log fitting in off-grid structures. To ensure proper alignment and stability, maintain a minimum gap width of 8 cm, but aim for a slightly larger width of 8.5 cm at the narrowest point to account for natural variations in log sizes. This extra margin enhances the snug fit and stability of the logs, ensuring the structure remains secure.
When adjusting your scriber, set it to accommodate the largest anticipated gap plus an additional 1 cm. This ensures an accurate measurement and optimal log fit. Begin by calibrating the scriber to a level line to confirm precision, as any deviation can compromise structural integrity.
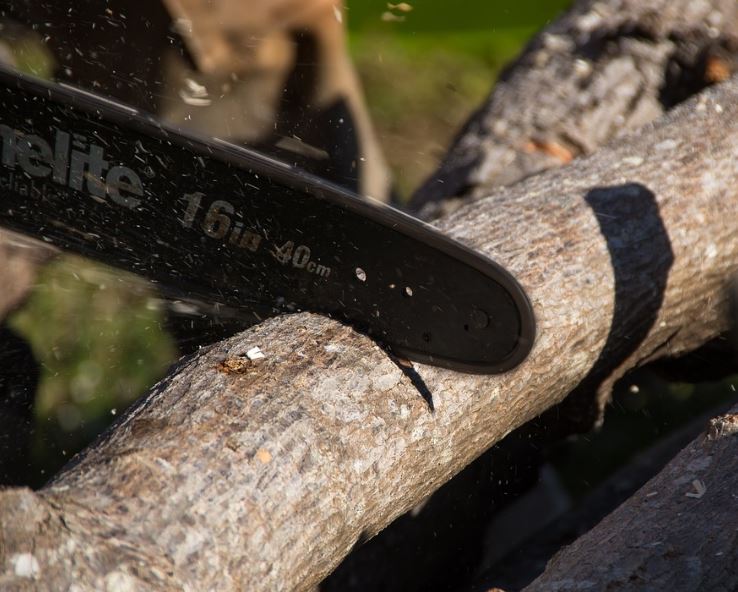
Cutting Methods
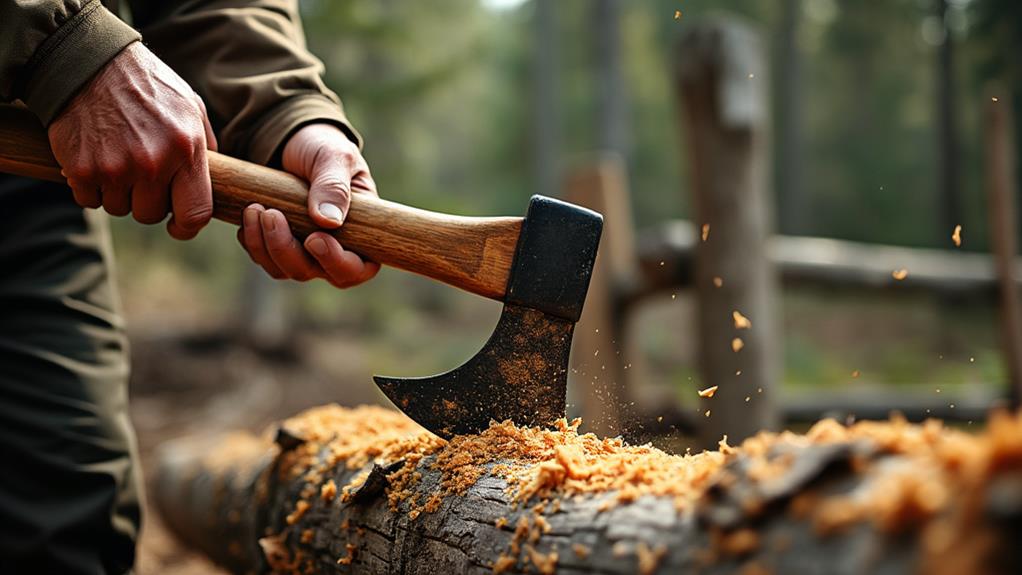
When it comes to cutting methods for building fences, the Gransfors Bruk model 1900 Swedish ax is highly recommended. This ax is renowned for its efficiency in log work, making it ideal for crafting off-grid structures.
Begin by scribing precise lines on your logs, marking "belly grooves" and notches to guide your cuts. Always cut between these lines to separate wood fibers effectively while preserving the log's integrity.
Safety measures are crucial. Using log dogs to prevent log rotation is imperative, as they keep your logs secure, enabling clean, accurate cuts. For creating notches, an adze axe is invaluable, forming slightly concave shapes that enhance the stability and accuracy of your joints, ensuring a snug fit between logs.
Joint Integrity
Achieving solid joint integrity is essential for a durable and stable fence. To prevent future issues, ensure each joint fits snugly. Start by thoroughly inspecting your belly grooves and notches after completing them. Confirm a proper fit before sealing with moss, which is crucial for joint stability.
Calibrate your scriber's width to accommodate the largest gap you expect, adding an extra centimeter. This ensures tight joints. Aim for a minimum gap width of 8 cm, but if possible, go for a slightly tighter 8.5 cm to enhance stability.
Precision is key. Follow marked lines exactly when making cuts to maintain the logs' fiber integrity and create stronger joints. Using log dogs during cutting is an effective technique; these tools prevent log rotation, ensuring your joints remain consistent and reliable.
Building Process
To start building your log fence, peel and scribe each log with precision, ensuring that the belly groove and notch lines are clearly marked. This meticulous preparation is crucial for achieving clean cuts and optimal log aesthetics. Using a Swedish ax, such as the Gransfors Bruk model 1900, will assist in making the precise cuts and shapes required for a snug fit.
Next, elevate your logs off the ground. This is essential for long-term sustainability, as it prevents bug infestations that could compromise the structure over time. Make sure your scribing tool is calibrated to accommodate a minimum gap width of 8 cm, ideally 8.5 cm, to ensure each log fits tightly.
Before assembling the logs, always check the joint integrity. Confirm that each joint is secure and fits well before applying natural materials like moss to insulate the gaps.
These steps not only enhance log aesthetics but also contribute to the long-term durability and effectiveness of your fence or other off-grid structures. By focusing on these details, you'll create a sustainable and visually appealing log fence that stands the test of time.
Viewer Engagement
Engaging your viewers can significantly enhance the fence-building experience, transforming it into a collaborative and interactive journey. By encouraging feedback, you can gather valuable suggestions and insights that might improve your techniques and future projects. This active engagement fosters community building, creating a supportive space where everyone can share their experiences and ideas.
To maximize viewer engagement, consider these strategies:
- Encourage Subscriptions: Remind viewers to subscribe to stay updated on your latest projects and techniques.
- Express Appreciation: Regularly thank your viewers for their support, fostering a positive and welcoming atmosphere.
- Share Progress Updates: Keep your audience excited by sharing updates and inviting them to follow along with each step of the build.
- Highlight Contributions: Feature viewer questions and contributions in your videos to make them feel valued and involved.
Conclusion
By mastering the use of an axe, you're not just building fences and off-grid structures; you're embracing a time-honored tradition of craftsmanship. With the right tools, precise techniques, and proper maintenance, your projects will stand the test of time, showcasing both durability and beauty. Each cut and notch is a step towards creating something truly unique. So grab your axe and get started—your next masterpiece is just a few swings away.