How to Make a Temporary Axe Handle in the Field
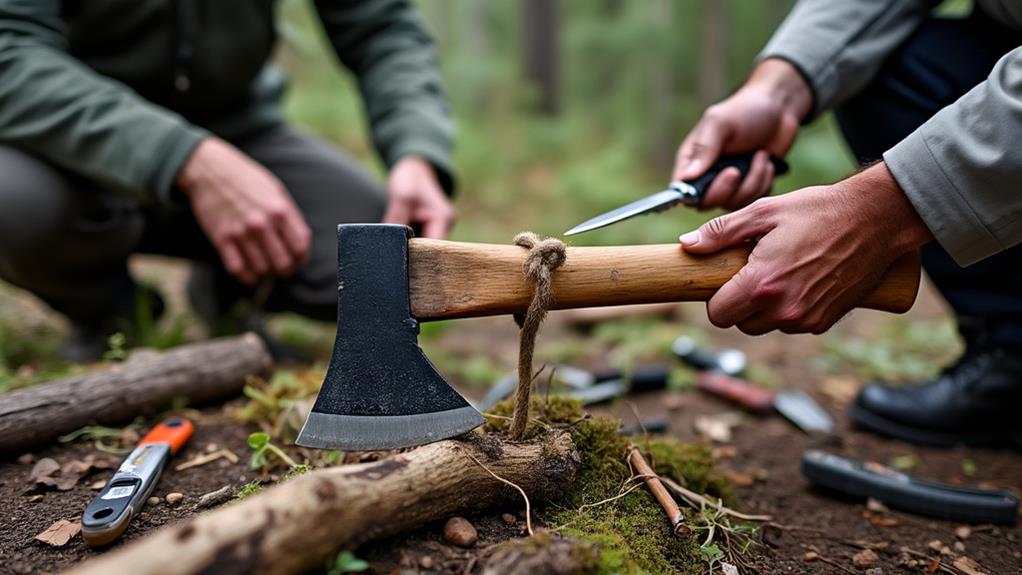
When you're out in the field and your axe handle breaks, knowing how to craft a temporary replacement can be an essential skill. Start by finding a straight-grained branch from a hardwood tree, such as oak or hickory, which should be around 1 to 1.5 inches in diameter.
Remove the broken handle, then carve the new one to fit snugly into the axe head. To ensure it stays secure and is safe to use, wedge the new handle tightly and bind it with cord or wire for added stability.
Let's examine the steps to ensure your axe is ready for action.
Importance of Field Skills
Field skills are crucial when navigating the wilderness, especially for tasks like crafting a temporary axe handle. Proficiency in creating axe handles is a vital survival skill, particularly in remote areas where supplies are scarce. Adaptability with available resources becomes paramount.
You may need to fashion a handle from local wood types, and understanding their properties is essential. For example, wood from slower-growing trees with dense growth rings is generally stronger and more durable for axe handles. This knowledge can significantly affect the lifespan and reliability of your makeshift tool.
Experience with handle replacement techniques is also important. If you need to remove a broken handle using improvised tools, your ability to do so ensures your equipment remains functional.
Practicing these skills in a controlled environment before venturing into the wilderness can be immensely beneficial. It prepares you for real-life challenges, enhancing your efficiency and confidence. The more practiced you are, the better your chances of survival when the unexpected occurs.
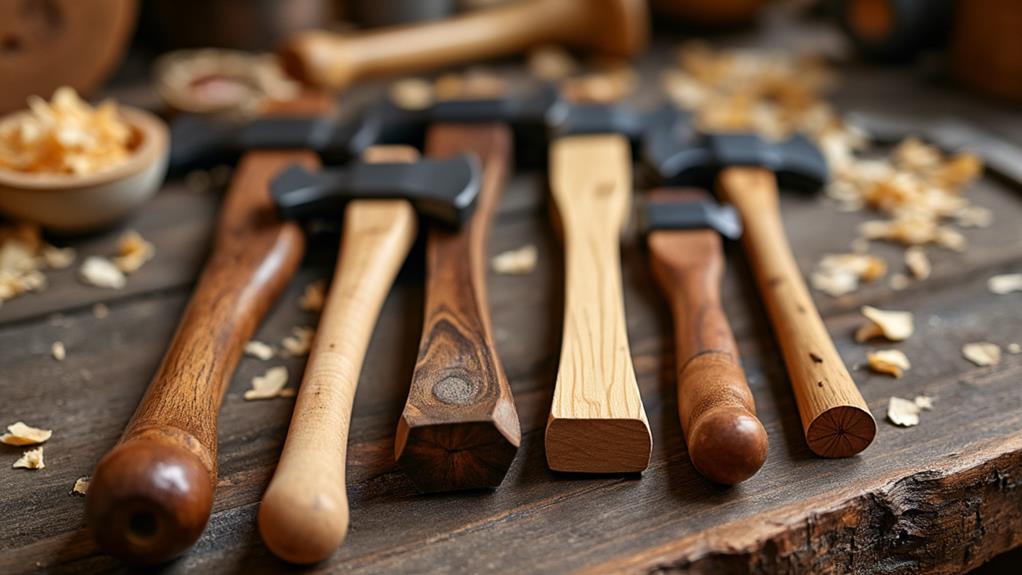
Selecting Suitable Wood
Selecting the right wood for a temporary axe handle is crucial for both safety and functionality. Look for well-shaped branches or saplings with a straight grain, ensuring they're at least 1-1.5 inches in diameter. This provides the necessary strength to prevent breakage.
For optimal results, choose wood from slower-growing trees with dense growth rings, such as sugar maple, renowned for its strength and durability. In high alpine areas, pine is a robust alternative.
Avoid hickory if it's not readily available, as it may be hard to find and not offer an immediate solution. Seasoned wood is essential since green wood, which hasn't dried properly, can weaken the handle and lead to failure.
Prioritize wood that has already dried. Lastly, assess the local wood types and their properties, as different species offer varying levels of workability and strength. Choose wisely to craft a reliable temporary axe handle.
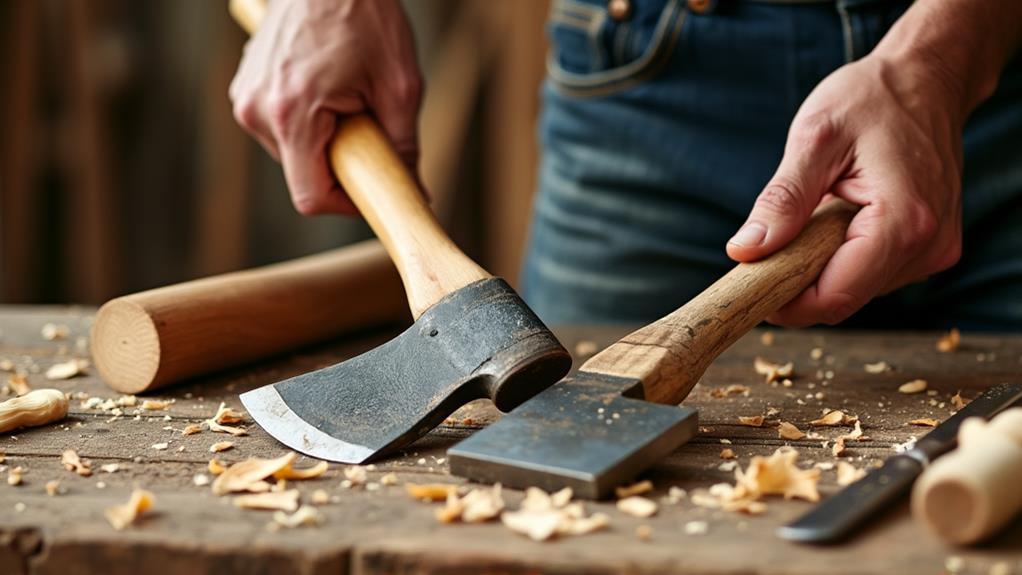
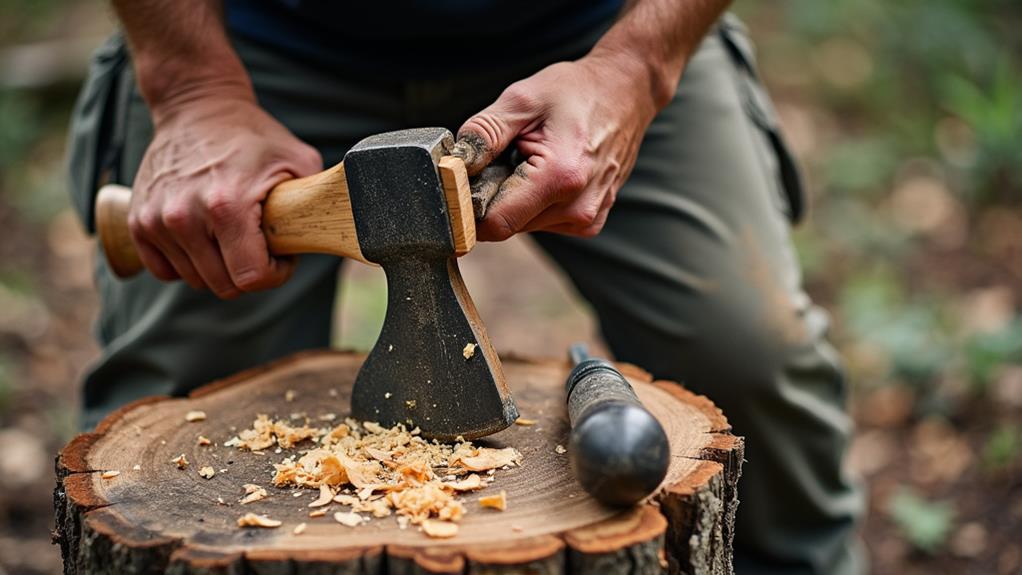
Removing the Broken Handle
To remove the broken axe handle, begin by cutting the remaining shaft below the axe head. If it's stuck, use tools like hardwood dowels and rocks to carefully drive it out without damaging the axe head. Handle the axe head with care to maintain its functionality.
Improvised Extraction Methods
Removing a broken axe handle can be challenging, but with a few improvised extraction methods, you can complete the task effectively. Start by cutting the old handle just below the axe head to make it easier to remove the remaining pieces without damaging the axe head. If you have access to a hardwood dowel or a sturdy rock, use these to drive out the remnants. Insert your improvised tool into the axe eye and tap it gently but firmly to push the broken bits free.
Another method involves carefully burning out the broken handle. While effective, this method is risky because it can damage the temper of the axe blade. Proceed with caution and keep the flame focused on the wood. Alternatively, you can use a metal tool like a screwdriver or chisel to pry out the pieces, but be careful not to scratch or dent the axe head.
Throughout the process, handle the axe head carefully to prevent injuries and avoid causing additional damage to your tool. With patience and the right techniques, you'll have the broken handle removed successfully.
Careful Blade Handling
When dealing with a broken axe handle, handle the blade with utmost care to avoid injuries and further damage. Start by cutting the remaining shaft below the axe head to facilitate the extraction of the broken handle from the axe eye.
Use improvised tools like hardwood dowels or rocks to help drive out any stubborn pieces still lodged in the head. Be cautious during this process to avoid damaging the blade. Avoid methods like burning to remove the handle, as any unnecessary force can compromise the axe's integrity and increase the risk of injury.
After removing the broken handle, carefully inspect the axe head for any signs of damage or wear that could affect the fit of the new handle. Ensuring the axe head is undamaged is essential for the secure and functional installation of the new handle.
Use gentle but firm taps to dislodge the broken handle, as excessive force can be counterproductive and unsafe.
Tools and Techniques
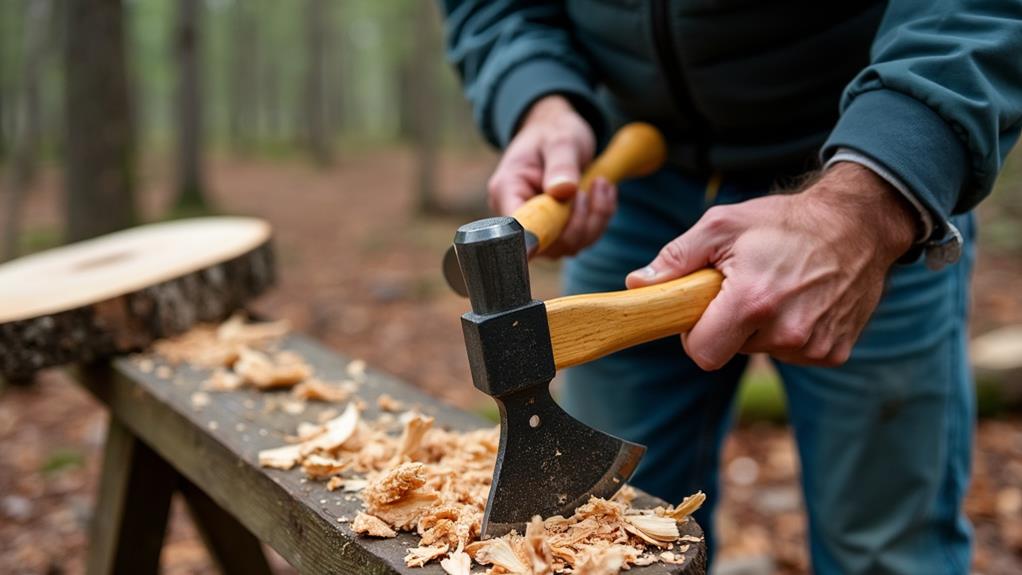
Creating a temporary axe handle in the field requires a few essential tools and techniques to ensure effectiveness and safety. Primarily, you'll rely on hand tools such as a knife and the axe head itself, as these are usually the most accessible. If available, use a bucksaw to split wood into manageable pieces before carving the handle, as this facilitates shaping the wood more efficiently and safely.
When carving the wood, ensure the grain runs vertically from the handle to the axe head. This alignment provides maximum strength and durability. Carefully carve the wood into the desired shape, frequently checking against the axe head for a snug fit. Remove any high spots and make necessary adjustments.
Next, create a wedge from the same wood. The wedge should be taller than the axe head and taper down to about 3/8 inch thickness. Precision is crucial, as the wedge secures the handle in place. Regularly check the handle's fit, and only install the wedge once the handle fits snugly. This approach ensures that your temporary axe handle is both functional and safe to use.
Practical Considerations
When making a temporary axe handle in the field, improvisation is key. In remote locations, you must use available materials such as well-shaped branches or seasoned wood to create your new handle. Assess your surroundings to identify wood that's strong and straight enough for chopping tasks.
You'll need a knife and the axe head you're repairing. Supplementary tools like a bucksaw can make the process easier, but you can also improvise using hardwood dowels or rocks for shaping and fitting the handle.
Carefully cut the broken handle below the axe head to avoid damaging the axe eye. To secure your new handle, create a wedge from the same wood for a snug fit and improved stability. This step is essential for the handle's performance.
Practicing this process in controlled settings can enhance your skills, making it easier to execute efficiently in the field. By mastering these techniques beforehand, you'll be better prepared to create a temporary axe handle when needed.
Shaping the Handle
Selecting the right branch is crucial for shaping a reliable temporary axe handle. Aim for a branch with a straight grain, ideally from a slower-growing tree such as pine, to ensure the strength and durability needed.
Once you've found your branch, use a knife to carve it down, maintaining a consistent thickness of approximately 3/4 to 7/8 inch, depending on the intended use of the axe. Regularly check the handle shape against the axe head to ensure a snug fit. Mark high points with crosshatched pencil marks and carefully remove material until the fit is precise.
Keeping the handle smooth and consistent is important to avoid weak points that might break under pressure. Next, create a wedge from the same type of wood. This wedge should be taller than the axe head and taper down to about 3/8 inch in thickness to effectively secure the handle in place.
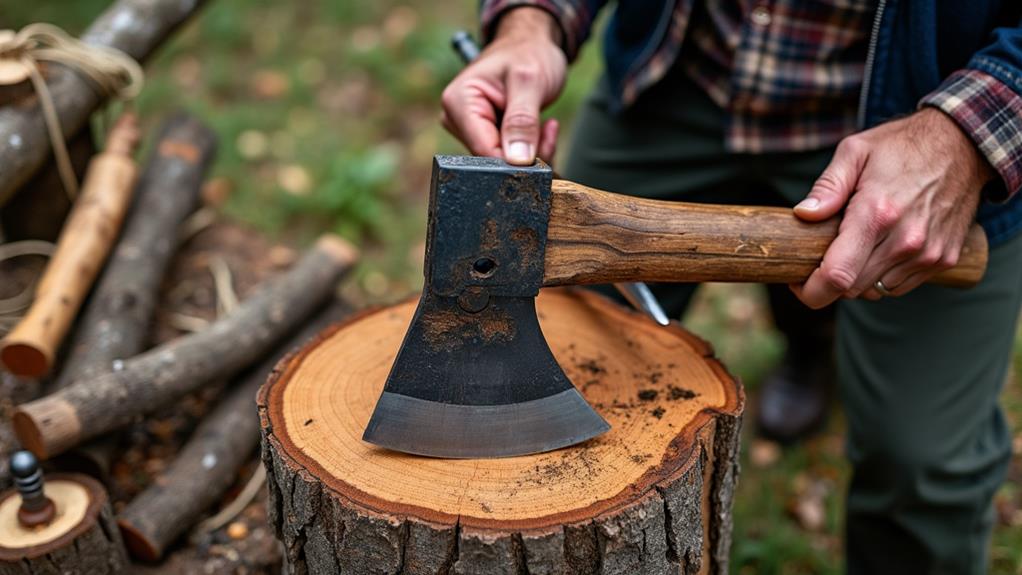
Fitting the Axe Head

To fit the axe head onto your newly shaped handle, begin by confirming that the blade is square and centered. Draw reference lines through the center of the handle to guide you, ensuring a balanced and effective tool.
Start by using larger tools to remove excess material from the handle, focusing on the areas that will sit inside the axe eye. This rough fit helps identify where the axe head might pinch or not seat properly.
Next, identify any high spots on the handle. Use crosshatch pencil marks to highlight these areas. As you fit the axe head, the pencil marks will be rubbed off in spots where the handle is too thick.
Carefully carve away these high spots until the pencil lines are no longer visible, ensuring a snug fit. Periodically check that the axe head aligns correctly with your reference lines to maintain balance and effectiveness.
Once a snug fit is achieved, the handle should sit firmly within the axe eye, ready for the next step of securing the wedge to confirm stability.
Securing the Wedge
After fitting the axe head, choose a straight-grained hardwood wedge for a secure attachment. Properly align the wedge with the handle's kerf and use a steel hammer to drive it in firmly. Regularly inspect and tighten the wedge to ensure a secure fit during use.
Selecting Wedge Material
Selecting the right wedge material is crucial for securing your axe head effectively. Opt for straight-grained hardwoods like hickory, oak, or ash, as these woods provide the strength and durability necessary for a reliable axe handle. A wedge made from these materials ensures the axe head remains stable during use.
When selecting your wedge, ensure it's taller than the axe head and tapers to a thickness of about 3/8 inches. This tapering design allows the wedge to fit securely as it's driven into the handle. Avoid wedges with excessive grain runout, as they're prone to breaking under pressure, compromising the stability of your axe head. Prepare your handle by creating a kerf down its center where the wedge will be inserted. This kerf helps the wedge expand the handle, creating a tighter fit.
Use a steel hammer to drive the wedge securely into place, ensuring it seats snugly and stabilizes the axe head effectively. By carefully selecting and fitting your wedge material, you'll enhance the performance and safety of your axe handle.
Proper Wedge Placement
- Begin by selecting a wedge made from straight-grained hardwood, known for its stability and durability. The wedge should be slightly taller than the axe head and taper to about 3/8 inches in thickness.
- Next, create a kerf down the center of the handle to accommodate the wedge. This kerf should be deep enough to allow the wedge to fit snugly, preventing any movement during use.
- Insert the wedge into the kerf and use a steel hammer to drive it in firmly, compressing the wood fibers and creating a tight bond between the handle and the axe head.
- For added security, you can insert a metal wedge perpendicular to the wooden wedge. This metal wedge will further spread the wooden wedge, enhancing overall stability.
- After installation, regularly check the fit. Look for any gaps or movement in the axe head. A properly secured wedge should prevent any shifting.
Be cautious of excessive grain runout in the wedge, as it can weaken the handle's strength and durability.
Tightening Techniques
Driving the wedge with precision is crucial for securing your temporary axe handle. Begin by ensuring the wooden wedge is taller than the axe head for a tight fit once tapped in. Use a steel hammer to drive the wedge, avoiding excessive grain runout to maintain strength.
Before starting, create a kerf down the center of the handle to help the wedge expand the wood fibers for a more secure grip. For effective tightening, use a flat peen hammer to apply consistent pressure while driving the wedge, ensuring an even tightening effect and preventing the handle from loosening during use.
Frequently check the snugness to make necessary adjustments before the wedge is fully secured. If one wedge isn't sufficient, consider using multiple small wedges to distribute pressure evenly and enhance the handle's stability.
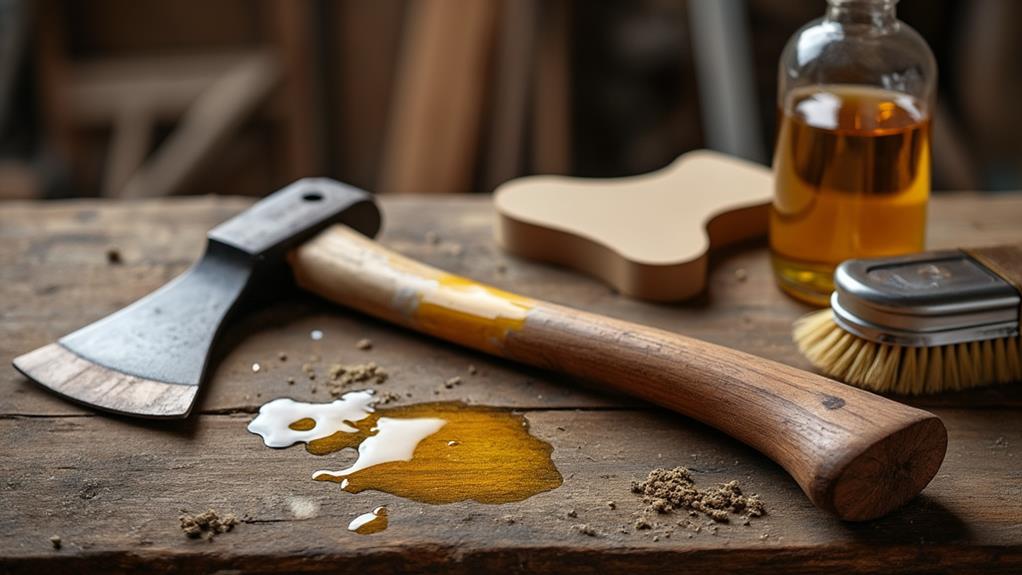
Finishing Touches
To complete your temporary axe handle, start by sanding the surface with progressively finer grits to achieve a smooth, comfortable finish. This step is crucial for ensuring that your handle is easy to grip and reduces the risk of blisters during use.
- Begin with a coarse grit to remove any rough spots, then move to finer grits to smooth out the surface.
- Next, apply a protective oil, such as flax oil, to your handle. This finishing touch enhances durability and helps prevent moisture damage.
- For optimal results, soak the handle in the oil to ensure maximum absorption. This not only protects the wood but also gives it a nice sheen.
- Test the fit of the axe head on the handle. Remove material from high points to achieve a snug, secure connection.
Once satisfied, install the wedge and set it firmly using a steel hammer. This ensures the axe head stays securely attached during use.
Community Insights
After putting the finishing touches on your temporary axe handle, it's beneficial to leverage the wealth of knowledge within the woodworking community. Engaging with fellow woodworkers can refine your skills and provide invaluable insights. Community discussions emphasize the importance of sharing personal experiences and techniques, contributing to a collective knowledge base that is highly resourceful.
Experienced woodworkers often recommend using locally available wood types. This practice not only promotes resourcefulness but also ensures your temporary axe handle is made from materials well-suited to your environment. Online forums are excellent platforms for exchanging advice on these materials and methods.
Practicing handle-making techniques in controlled environments before heading into the wilderness can significantly enhance your craftsmanship. This preparation equips you to handle unexpected challenges in the field.
Collaborating with community members often leads to creative solutions for temporary handle replacements. Here are some advantages of community engagement:
| Benefit | Description |
|---|---|
| Shared Experiences | Learn from others' successes and mistakes |
| Local Wood Recommendations | Identify the best local woods for temporary axe handles |
| Practical Advice | Get tips on tools and methods for crafting in the field |
| Problem-Solving | Collaborate to find inventive solutions for unique challenges |
Conclusion
Mastering the skill of making a temporary axe handle in the field is both practical and empowering. By learning to select the right wood, removing the broken handle, and shaping a new one that fits snugly, you ensure your axe is functional. Securing the wedge and checking for stability guarantees that your axe is ready for use. These skills not only increase your self-reliance but also connect you to traditional craftsmanship. Keep practicing, and you'll always be prepared.